
Rebuilding a Classic Studio Open Reel-to-Reel Deck for 2026
- Mako
- Mar 4
- 4 min read

Analog Soundware Restoration Lab, Part I

Welcome to Analog Soundware Restoration Lab, a new series dedicated to the art and science of preserving and elevating the sonic legacy of open reel-to-reel tape decks. For the serious audiophile, the dedicated collector, and those captivated by the unparalleled fidelity of analog tape, this column will serve as your guide through the intricacies of restoration, servicing, maintenance, and the discerning acquisition of these magnificent machines.
In an era dominated by digital convenience, the magnetic magic of reel-to-reel stands as a testament to pure, uncompromised sound—and ensuring these legends perform at their peak requires knowledge, patience, and a touch of passion.
In this inaugural installment, we embark on a journey that will define the ethos of Analog Soundware Restoration Lab: the complete overhaul of a classic studio open reel-to-reel deck for the year 2026.
______________________________________________________________________________________
The Allure of the Studio Open Reel-to-Reel Deck Standard:
Why Rebuild Now in 2026?
Open reel is no longer a commodity format. It is a specialist pursuit—arguably the purest form of analog playback available outside a mastering studio.
The decision to rebuild a classic studio machine, rather than a consumer deck, for our first deep dive is deliberate. Studio decks, such as a Studer A810, Otari MX-55, Ampex ATR-102, or a Revox PR99, were engineered for continuous, demanding professional use. This means robust mechanics, modular electronics, and often, superior head assemblies—qualities that provide an exceptional foundation for a truly high-end restoration. These machines are not just playback devices; they are precision instruments, designed to capture and reproduce sound with unflinching accuracy.
The challenge, and indeed the reward, lies in unlocking their full potential in 2026. Many of these decks are now 30, 40, or even 50 years old. While their core engineering remains peerless, capacitors have dried, rubber has perished, and critical components have drifted. Our goal is to address these age-related ailments, apply contemporary understanding of audio path optimisation, and transform them into reference-grade playback devices that can rival, and often surpass, any modern source.
A proper rebuild is not cosmetic. It is mechanical, electrical, and calibration-intensive. And when executed correctly, it transforms an ageing transport into a world-class playback platform.

_______________________________________________________________________________________
Step One: Choosing the Right Platform
Before rebuilding comes selecting.
In future installments we will cover purchasing guidance in depth, but the fundamental principles are:
Choose a machine with documented service history if possible.
Prioritise head condition over cosmetic appearance.
Avoid units with severe corrosion or evidence of poor amateur modification.
Confirm parts availability (rollers, relays, belts, motors).
Professional studio decks are preferable to consumer machines because they were designed to be serviced. Modular electronics, accessible transports, and calibration documentation are not luxuries—they are necessities.

Step Two: Mechanical Overhaul — The Transport Is Everything
If the transport is unstable, no amount of electronic refinement will save the deck.
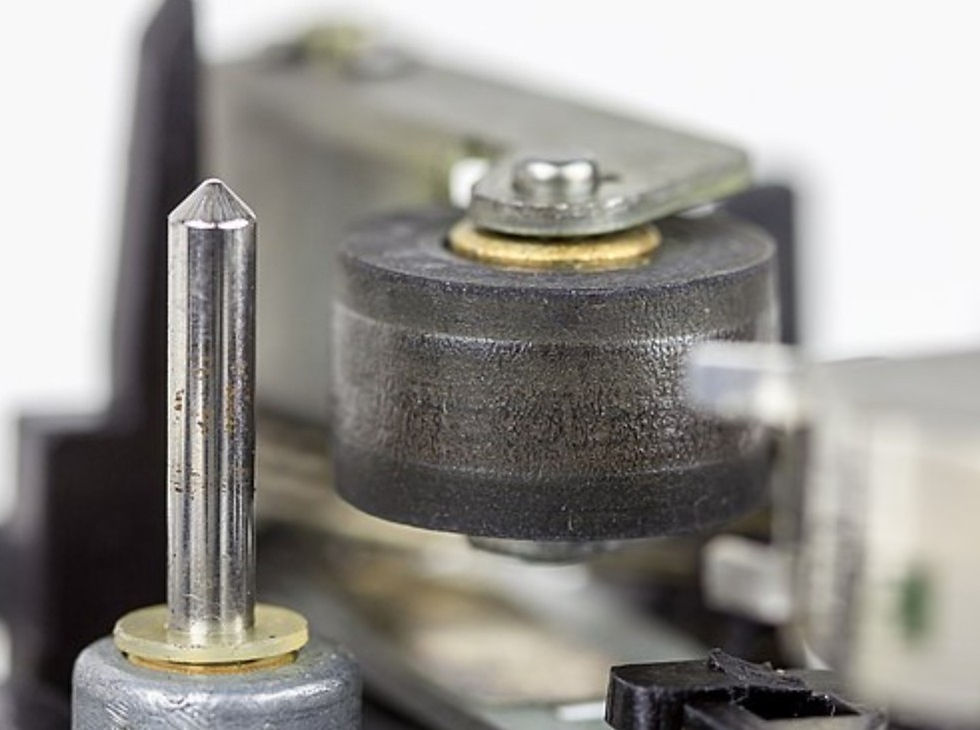
Capstan and Motor System
The capstan defines speed stability. Inspect:
Bearing smoothness (no axial or radial play).
Surface finish (no scoring).
Motor noise under load.
In direct-drive capstan systems, bearing wear can introduce microscopic speed modulation—audible as low-level blur in sustained piano notes.
Pinch Roller
A hardened pinch roller introduces:
Slippage
Scrape flutter
Uneven tape tension
Re-rubbering by a specialist is often mandatory in a full rebuild.
Reel Motors and Braking
Torque must be symmetrical and progressive. Excess braking causes tape edge damage. Weak braking causes tape spill. Proper torque calibration is not optional—it is central to tape handling integrity.
Step Three: Heads — The Interface With History
Heads determine resolution.
Before proceeding with electronics, inspect:
Wear pattern depth
Channel symmetry
Edge erosion
Azimuth alignment
Moderate wear can be corrected by professional relapping. Deep flat spots may require replacement.
In this series, we will dedicate an entire installment to head geometry, azimuth optimization, and when to replace versus relap.
Step Four: Electronics — Reliability Over Romanticism
Studio decks were precision tools. Their electronics must meet original performance specifications before any “upgrades” are considered.
Power Supply
Replace electrolytic capacitors.
Verify voltage rails under load.
Confirm regulator stability.
A noisy or unstable supply contaminates the entire signal path.
Signal Path
Resist the temptation to indiscriminately install boutique capacitors. Stability, noise floor, and correct bias calibration matter more than brand names.
Original engineering intent should be respected unless measurable improvement can be demonstrated.

Step Five: Calibration — Where Performance Is Won
Restoration without calibration is incomplete.
At minimum:
Playback EQ must be aligned to reference tape.
Record bias must be optimized for modern tape stock.
Channel balance must be confirmed at multiple frequencies.
Head azimuth must be set with precision instrumentation.
In a future issue of Restoration Lab, we will walk through bias calibration in detail—including over-bias technique, distortion measurement, and formulation-specific adjustments for modern tape from Recording The Masters.
____________________________________________________________________________________
The Sonic Payoff
What does a fully rebuilt studio deck offer in 2026?
Effortless dynamic scale
Extraordinary transient realism
Stable pitch and timing
Natural saturation behaviour
A presentation that feels unprocessed
Tape does not sound “better” than digital by default. But when properly restored and aligned, a studio machine offers a continuity and dimensionality that few formats can rival.
_____________________________________________________________________________________
The Philosophy Behind Restoration Lab
This series is not about nostalgia. It is about stewardship.
Over the coming issues, we will explore:
How to Evaluate a Used Studio Deck Before Purchase
Transport Mechanics: Tension, Torque, and Tape Handling
Head Wear, Relapping, and Replacement Decisions
Bias Calibration Explained for Advanced Enthusiasts
Modern Tape Formulations and EQ Standards
Noise Reduction Systems: Dolby, dbx, and Purist Playback
Long-Term Maintenance Schedules for Collector-Grade Decks
Each article will combine technical depth with practical guidance—intended for serious audiophiles who want to understand not just what to do, but why it matters.
_______________________________________________________________________________________
A Final Word for the Serious Enthusiast
Restoring a classic studio open reel deck is not a weekend project. It is a methodical process that demands patience, measurement, and respect for the original engineering. For many, the idea of tearing down a complex machine might seem daunting. But the rewards are immense.
But when the reels begin to turn—smoothly, silently, precisely—and the first properly aligned playback fills the room, the reward is unmistakable. These machines offer a level of dynamic realism, spatial coherence, and sheer musicality that is increasingly rare in the digital domain.
This is not merely restoration. It is revival.
Welcome to Analog Soundware Restoration Lab.


Comments